
How to Launch a Linux Virtual Machine with Amazon EC2
This step-by-step guide will help you successfully launch a Linux virtual machine on Amazon EC2
Amazon Elastic Compute Cloud (EC2) is the Amazon Web Service you use to create and run virtual machines in the cloud. AWS calls these virtual machines ‘instances’. This step-by-step guide will help you successfully launch a Linux virtual machine on Amazon EC2 within our AWS Free Tier.
How to Launch a Linux Virtual Machine with Amazon EC2
Step 1: Launch an Amazon EC2 Instance
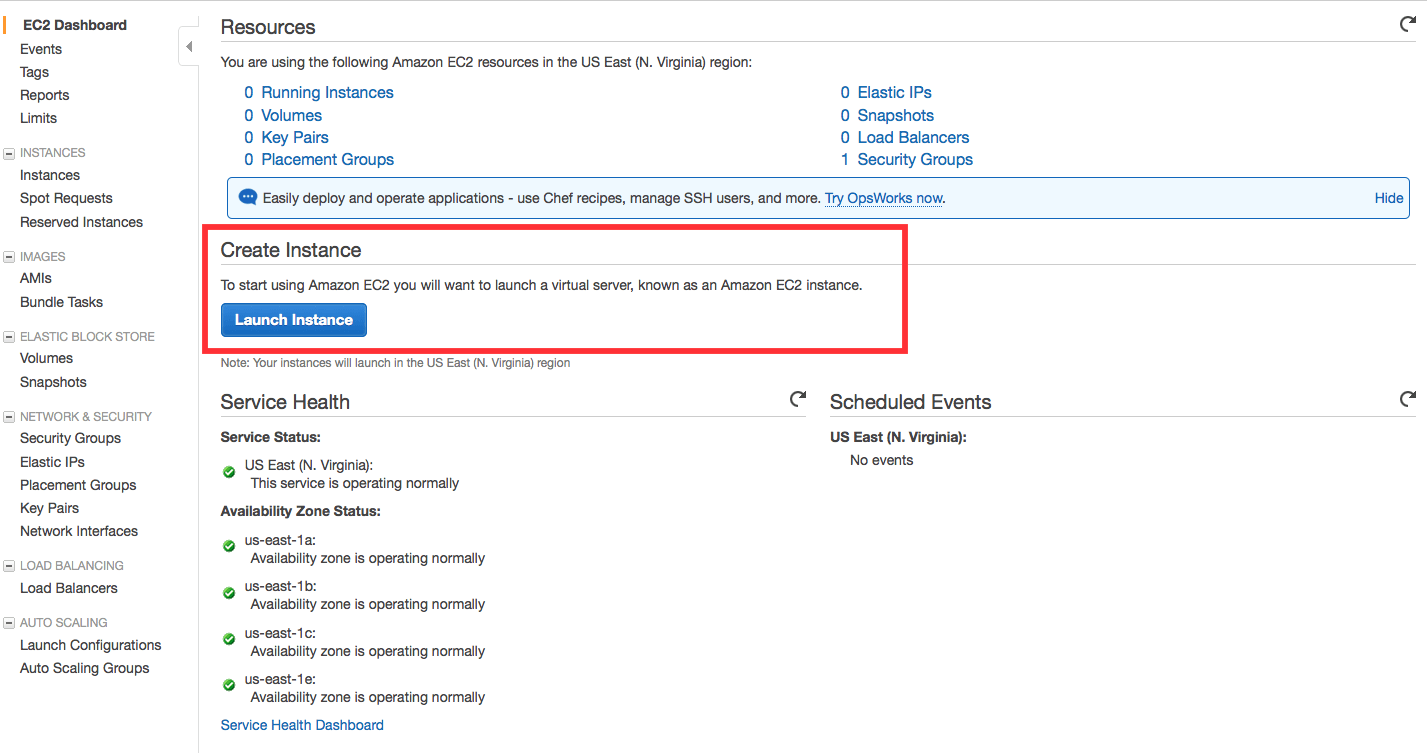
a. Click here to open the Amazon EC2 console and then click Launch Instance to create and configure your virtual machine.
Step 2: Configure your Instance
You are now in the EC2 Launch Instance Wizard, which will help you configure and launch your instance.
a. In this screen, you are shown options to choose an Amazon Machine Image (AMI). AMIs are preconfigured server templates you can use to launch an instance. Each AMI includes an operating system, and can also include applications and application servers.
For this tutorial, find Amazon Linux AMI and click Select.

b. You will now choose an instance type. Instance types comprise of varying combinations of CPU, memory, storage, and networking capacity so you can choose the appropriate mix for your applications. For more information, see Amazon EC2 Instance Types.
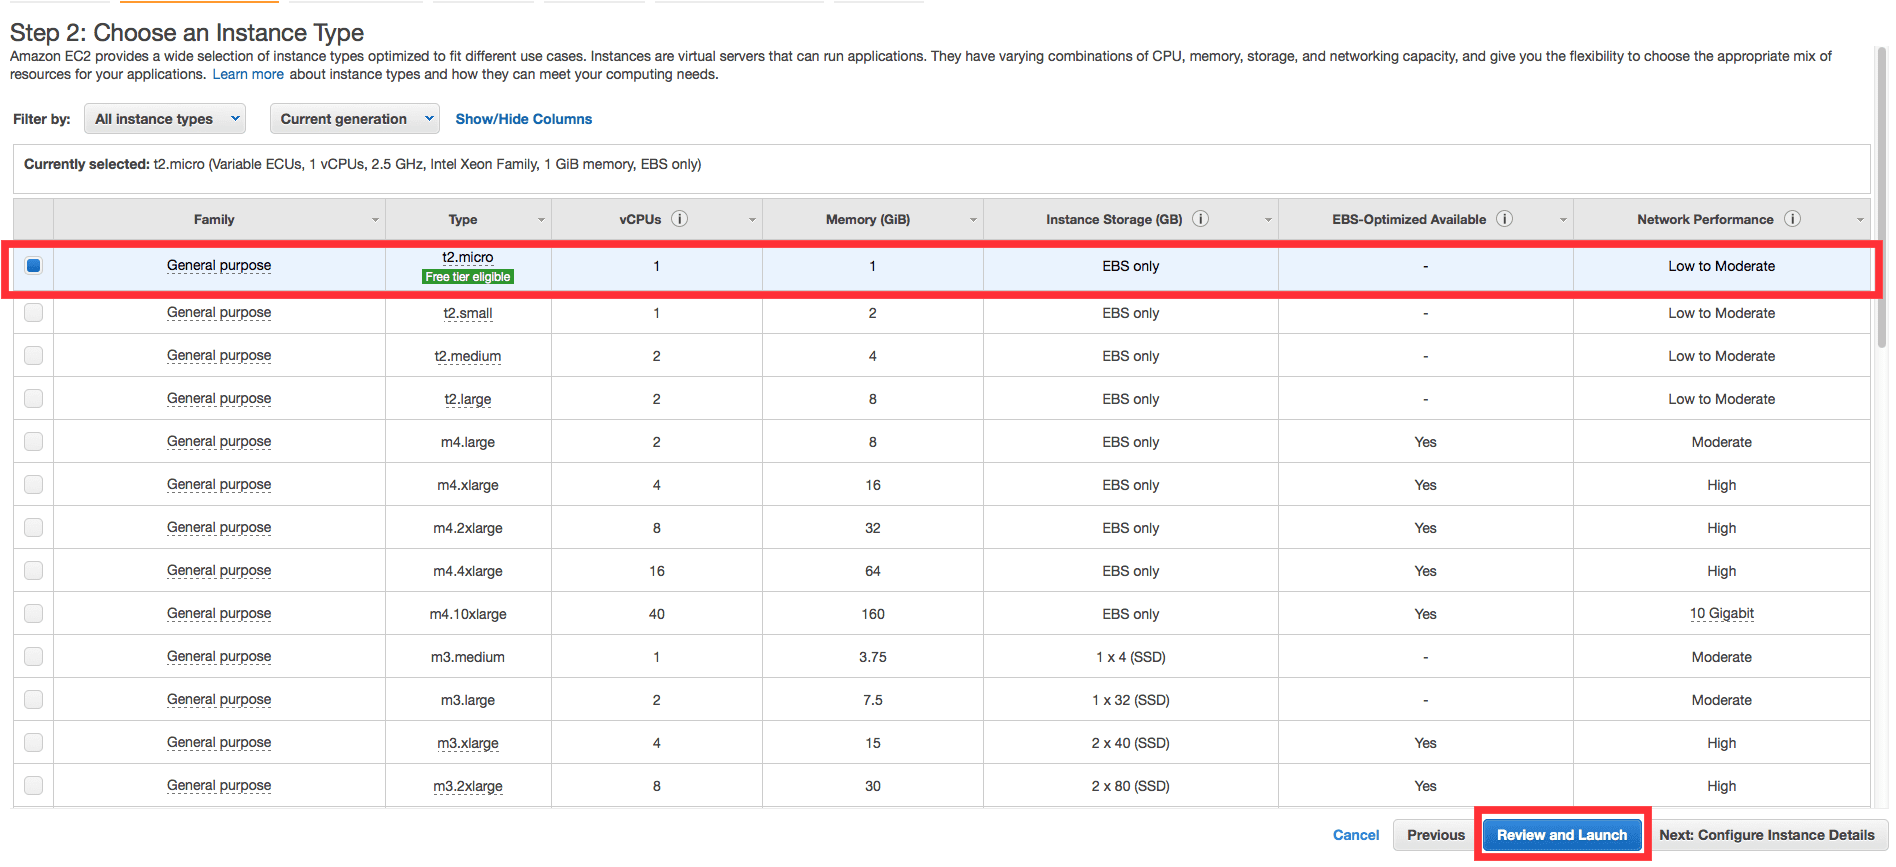
The default option of t2.micro should already be checked. This instance type is covered within the Free Tier and offers enough compute capacity to tackle simple workloads. Click Review and Launch at the bottom of the page.
c. You can review the configuration, storage, tagging, and security settings that have been selected for your instance. While you have the option to customize these settings, we recommend accepting the default values for this tutorial.
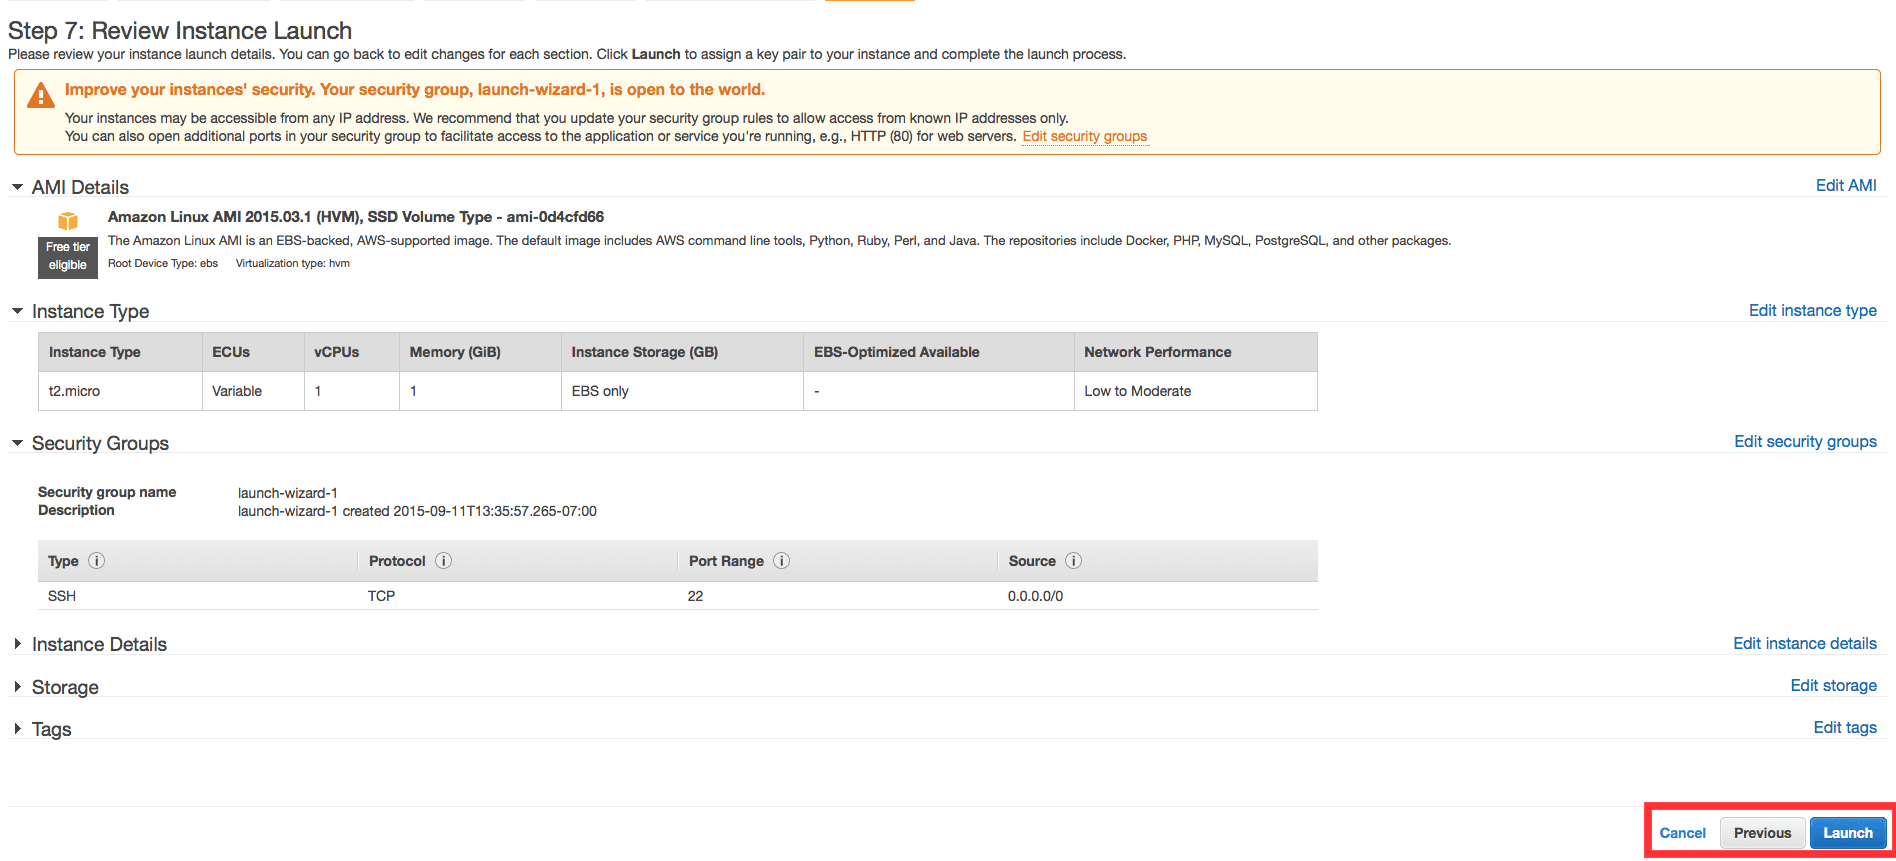
Click Launch at the bottom of the page.
d. On the next screen you will be asked to choose an existing key pair or create a new key pair. A key pair is used to securely access your Linux instance using SSH. AWS stores the public part of the key pair which is just like a house lock. You download and use the private part of the key pair which is just like a house key.
Select Create a new key pair and give it the name MyKeyPair. Next click the Download Key Pair button.
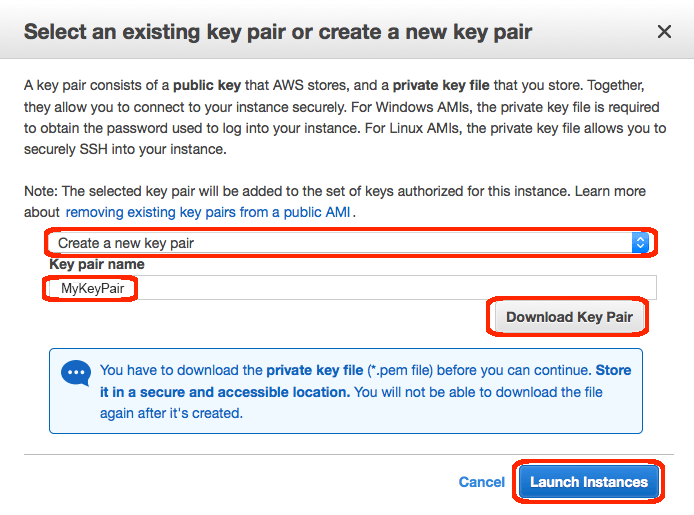
After you download the MyKeyPair key, you will want to store your key in a secure location. If you lose your key, you won’t be able to access your instance. If someone else gets access to your key, they will be able to access your instance.
Select your operating system below to see instructions on where to save your SSH key.
Windows
Windows users: We recommend saving your key pair in your user directory in a sub-directory called .ssh (ex. C:\user\{yourusername}\.ssh\MyKeyPair.pem).
Tip: You can’t use Windows Explorer to create a folder with a name that begins with a period unless you also end the folder name with a period. After you enter the name (.ssh.), the final period is removed automatically.
Mac / Linux
Mac/Linux users: We recommend saving your key pair in the .ssh sub-directory from your home directory (ex. ~/.ssh/MyKeyPair.pem).
Tip: On MacOS, the key pair is downloaded to your Downloads directory by default. To move the key pair into the .ssh sub-directory, enter the following command in a terminal window: mv ~/Downloads/MyKeyPair.pem ~/.ssh/MyKeyPair.pem
After you have stored your key pair, click Launch Instance to start your Linux instance.
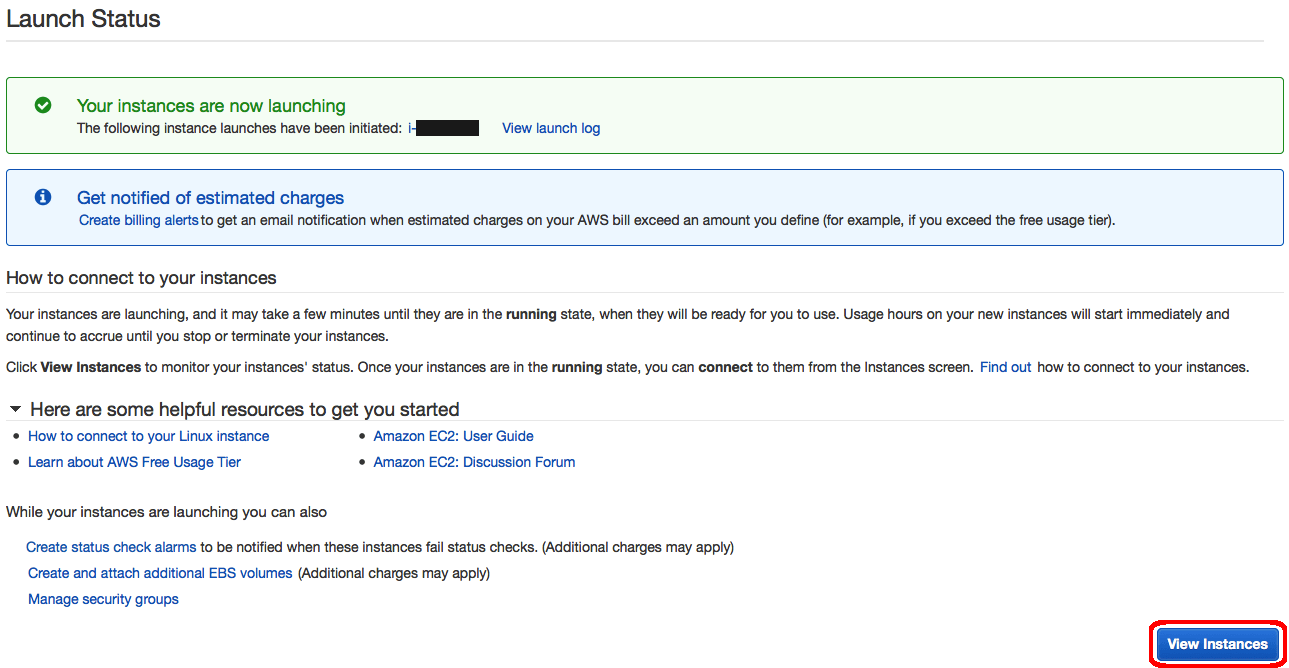
e. Click View Instances on the next screen to view your instances and see the status of the instance you have just started.
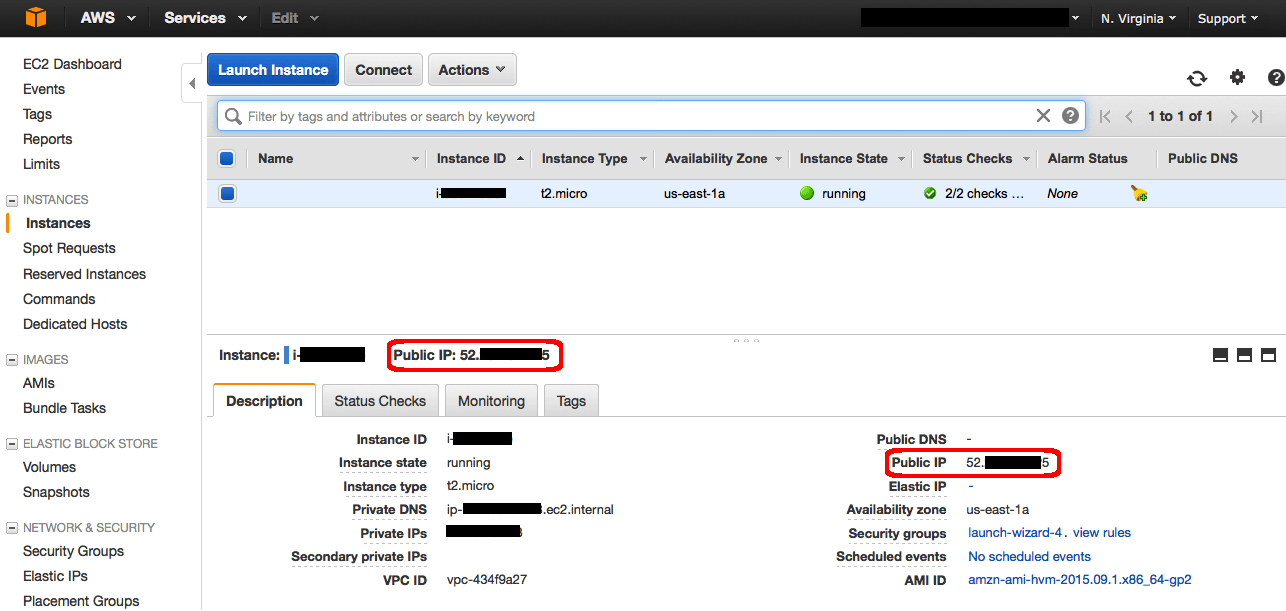
f. In a few minutes, the Instance State column on your instance will change to “running” and a Public IP address will be shown. You can refresh these Instance State columns by pressing the refresh button on the right just above the table. Copy the Public IP address of your AWS instance, so you can use it when we connect to the instance using SSH in Step 3.
Step 3: Connect to your Instance
After launching your instance, it’s time to connect to it using SSH.
Windows users: Select Windows below to see instructions for installing Git Bash which includes SSH.
Mac/Linux user: Select Mac / Linux below to see instructions for opening a terminal window.
Windows
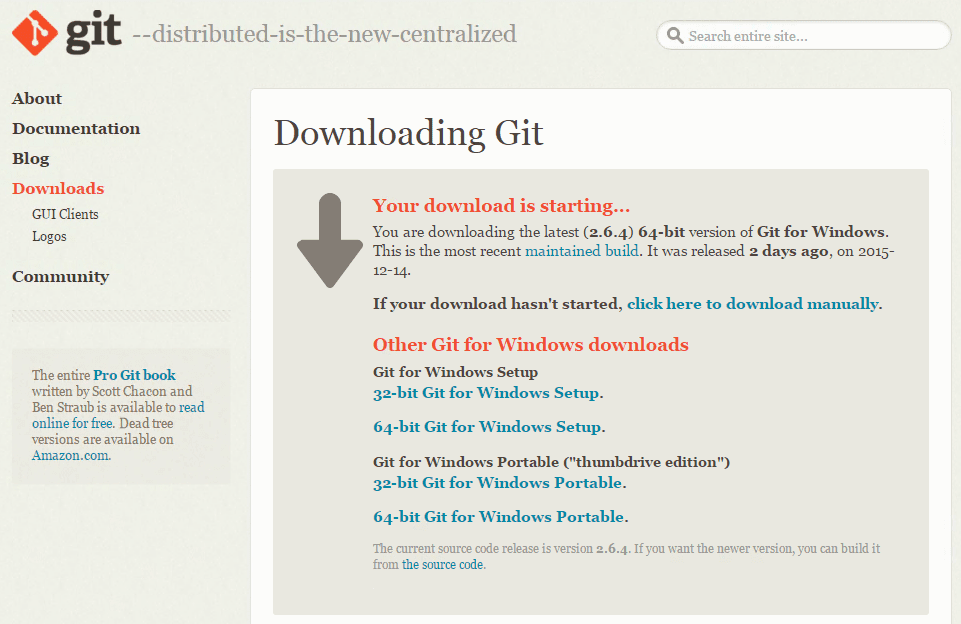
a. Download Git for Windows here. Run the downloaded installer accepting the default settings (this will install Git Bash as part of Git).
Mac / Linux
Your Mac or Linux computer most likely includes an SSH client by default. You can check for an SSH client by typing ssh at the command line. If your computer doesn’t recognize the command, the OpenSSH project provides a free implementation of the full suite of SSH tools that you can download.
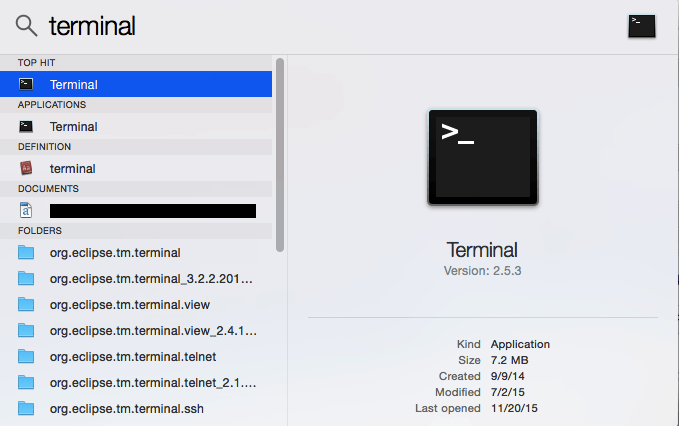
a. Mac users: Open a terminal window by pressing Command + Space and typing terminal in the search window. Then press enter to open the terminal window.
Linux users: Open a terminal window.
b. Use the chmod command to make sure your private key file is not publicly viewable by entering the following command: chmod 400 ~/.ssh/mykeypair.pem to restrict permissions to your private SSH key.
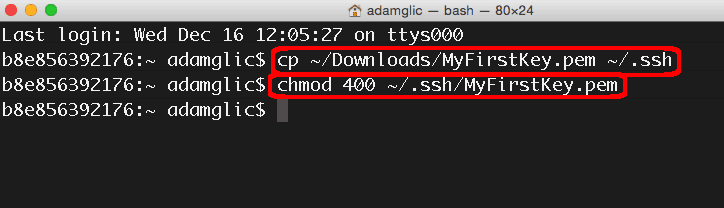
You do not need to do this every time you connect to you instance, you only need to set this once per SSH key that you have.
c. Use SSH to connect to your instance. In this case the user name is ec2-user, the SSH key is stored in the directory we saved it to in step 2 part d, and the IP address is from step 2 part f. The format is ssh -i {full path of your .pem file} ec2-user@{instance IP address}.
Mac/Linux users: Enter ssh -i ~/.ssh/MyKeyPair.pem ec2-user@{IP_Address} (ex. ssh -i ~/.ssh/MyKeyPair.pem [email protected])
You’ll see a response similar to the following:
The authenticity of host ‘ec2-198-51-100-1.compute-1.amazonaws.com (10.254.142.33)’ can’t be established. RSA key fingerprint is 1f:51:ae:28:df:63:e9:d8:cf:38:5d:87:2d:7b:b8:ca:9f:f5:b1:6f. Are you sure you want to continue connecting (yes/no)?
Type yes and press enter.

You’ll see a response similar to the following:
Warning: Permanently added ‘ec2-198-51-100-1.compute-1.amazonaws.com’ (RSA) to the list of known hosts.

You should then see the welcome screen for your instance and you are now connected to your AWS Linux virtual machine in the cloud.
Step 4: Terminate Your Instance
You can easily terminate the instance from the EC2 console. In fact, it is a best practice to terminate instances you are no longer using so you don’t keep getting charged for them.
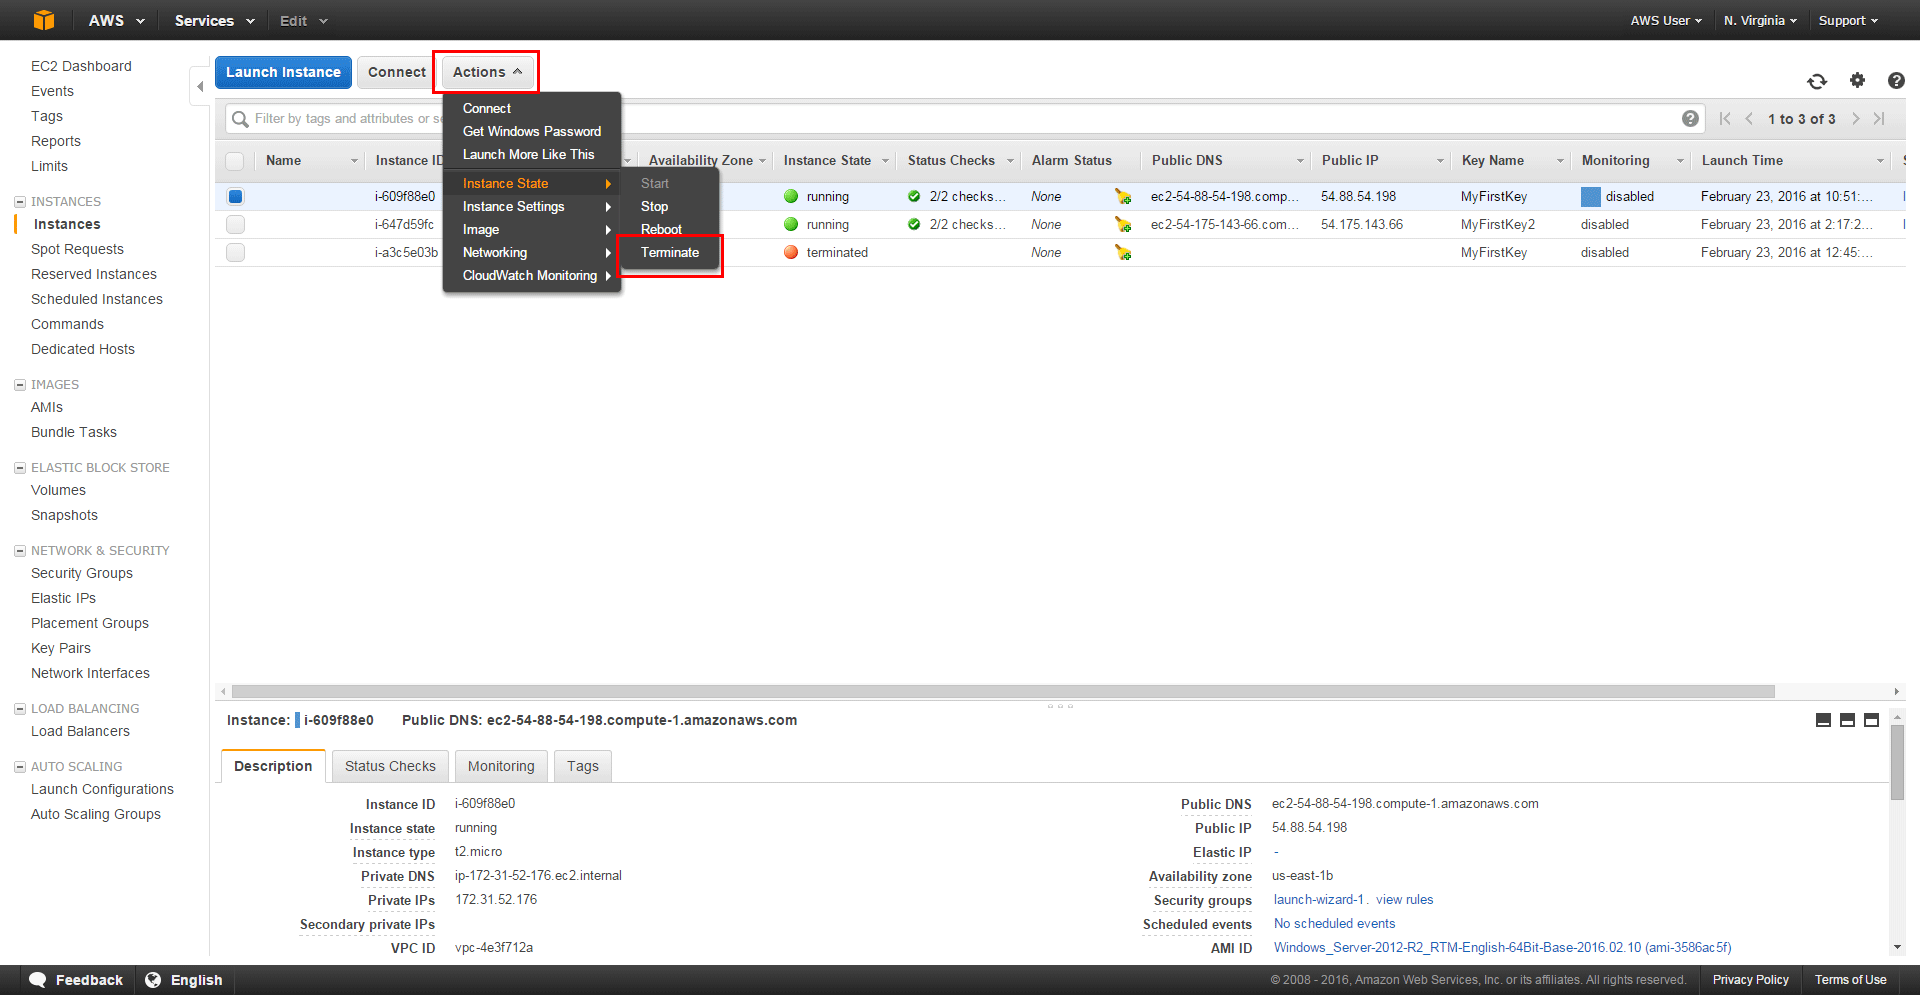
a. Back on the EC2 Console, select the box next to the instance you created. Then click the Actions button, navigate to Instance State, and click Terminate.
b. You will be asked to confirm your termination – select Yes, Terminate.
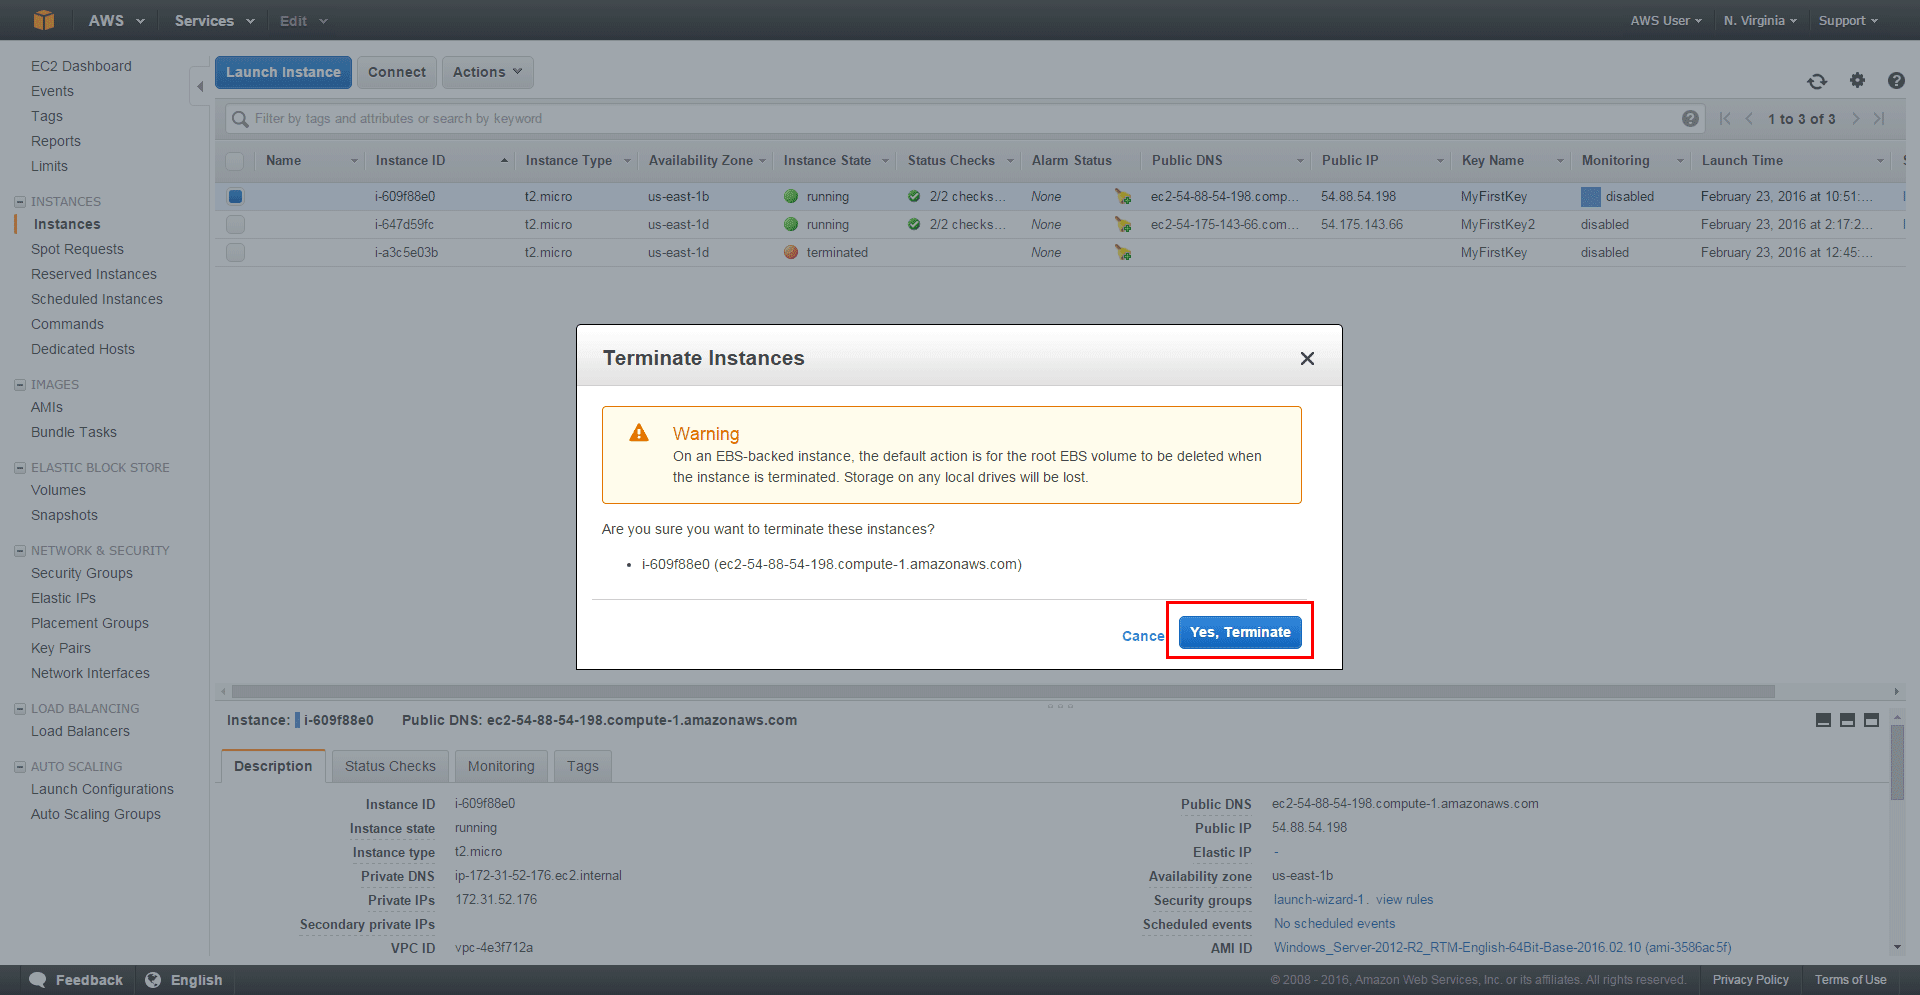
Note: This process can take several seconds to complete. Once your instance has been terminated, the Instance State will change to terminated on your EC2 Console.