Nextcloud is an open source, self-hosted file share and collaboration platform, similar to Dropbox. It comes bundled with media player, calendar and contact management. Nextcloud is extensible via apps and has desktop and mobile clients for all major platforms.
In this tutorial, we are installing NextCloud on CentOS 7. To configure NextCloud File Sharing Application, we will install Apache, PHP & MySQL then we will configure NextCloud.
We will install and set up a NextCloud on Alibaba Cloud Elastic Compute Service (ECS) with CentOS 7 installed.
Features
- Access your files anytime, anywhere.
- Share your files with the other users. Create and send password protected public links.
- Two-factor authentication with TOTP and QR code.
- Monitor the activity on your NextCloud server.
- NextCloud can access files stored in external cloud storage service providers such as Amazon, Google, and Dropbox.
Prerequisites
- You must have Alibaba Cloud Elastic Compute Service (ECS) activated and verified your valid payment method. If you are a new user, you can get $300 – $1200 worth in Alibaba Cloud credits for your new account. If you don’t know how to setup your ECS instance, you can refer to this tutorial or quick-start guide.
- A domain name registered from Alibaba Cloud. If you have already registered a domain from Alibaba Cloud or any other host, you can update its domain nameserver records.
- Domain name must be pointed to your Alibaba Cloud ECS’s IP address
- Access to VNC console in your Alibaba Cloud or SSH client installed in your PC
- Set up your server’s hostname and create a user with root privileges.
Environment Specification:
We have configured a CentOS 7 virtual machine with following specifications.
- CPU – 3.4 Ghz (2 cores)
- Memory – 2 GB
- Storage – 40 GB
- Operating System – CentOS 7.6
- Hostname – example.com
- IP Address – 192.168.116.6/24
Also Read: How to Install Zimbra Mail Server on CentOS 7
Installing Prerequisite Packages for NextCloud:
Nextcloud works only with PHP v7.x. So, we need to enable software collection repository.
So, Install required software packages using yum command.
yum install -y centos-release-scl

yum install -y epel-release
Install Apache
Install the Apache server and other utilities.
yum install -y httpd wget bzip2
Install PHP 7.x
Install PHP 7 and other required extensions for Nextcloud.
yum install -y rh-php72 rh-php72-php rh-php72-php-gd rh-php72-php-mbstring rh-php72-php-intl rh-php72-php-pecl-apcu rh-php72-php-mysqlnd rh-php72-php-pecl-redis rh-php72-php-opcache rh-php72-php-imagick rh-php72-php-ldap
Create symlinks so that Apache can support PHP 7.x.
ln -s /opt/rh/httpd24/root/etc/httpd/conf.d/rh-php72-php.conf /etc/httpd/conf.d/

ln -s /opt/rh/httpd24/root/etc/httpd/conf.modules.d/15-rh-php72-php.conf /etc/httpd/conf.modules.d/

ln -s /opt/rh/httpd24/root/etc/httpd/modules/librh-php72-php7.so /etc/httpd/modules/
Also, create a symlink for executing the php command.
ln -s /opt/rh/rh-php72/root/bin/php /usr/bin/php
Install MariaDB
The database can be any of from SQLite, MySQL/MariaDB, Oracle or PostgreSQL database.
For this demo, we will use MariaDB as a database for Nextcloud, and we will talk about the reason behind it later.
yum -y install mariadb-server mariadb
Services
Start the Apache and MariaDB service using the following command.
systemctl start httpd

systemctl start mariadb
Enable both Apache and MariaDB service to start automatically at system start-up.
systemctl enable httpd

systemctl enable mariadb
Install Nextcloud
NextCloud provides installable archives for server admins to download and manually set it up on top of the LAMP stack. Download the latest version of Nextcloud using the terminal.
cd /tmp/

wget https://download.nextcloud.com/server/releases/latest.tar.bz2
Extract the Nextcloud archive using the tar command.
tar -jxvf latest.tar.bz2
Move the extracted files to Apache’s document root and then create a data directory to hold the user data.
mv nextcloud /var/www/html/

mkdir /var/www/html/nextcloud/data
Set the ownership of the files inside the NextCloud directory so that apache user can write the data into it.
chown -R apache:apache /var/www/html/nextcloud/
Create Database
If you are setting up a MariaDB for the first time, then
Now, login to the MariaDB server.
mysql -u root -p
Create a database called “nextclouddb“.
create database nextclouddb;
Now you need to create the user that will be used to connect to the database:
CREATE USER 'nextcclouduser'@'localhost' IDENTIFIED BY 'YOUR_PASSWORD_HERE';
The last step is to grant the privileges to the new user:
grant all on nextclouddb.* to 'nextclouduser'@'localhost' ;
FLUSH PRIVILEGES;
Exit from the MariaDB prompt.
quit
SELinux
Set SELinux context to allow NextCloud to write the data inside its important directories.
semanage fcontext -a -t httpd_sys_rw_content_t '/var/www/html/nextcloud/data'
semanage fcontext -a -t httpd_sys_rw_content_t '/var/www/html/nextcloud/config(/.*)?'
semanage fcontext -a -t httpd_sys_rw_content_t '/var/www/html/nextcloud/apps(/.*)?'
semanage fcontext -a -t httpd_sys_rw_content_t '/var/www/html/nextcloud/3rdparty(/.*)?'
semanage fcontext -a -t httpd_sys_rw_content_t '/var/www/html/nextcloud/.htaccess'
semanage fcontext -a -t httpd_sys_rw_content_t '/var/www/html/nextcloud/.user.ini'

restorecon -Rv '/var/www/html/nextcloud/'
Firewall
Configure the firewall to allow access to the Nextcloud storage from external machines.
firewall-cmd --permanent --add-service=http

firewall-cmd --reload
Setup NextCloud
Open up your web browser, point a URL to http://example.com/nextcloud
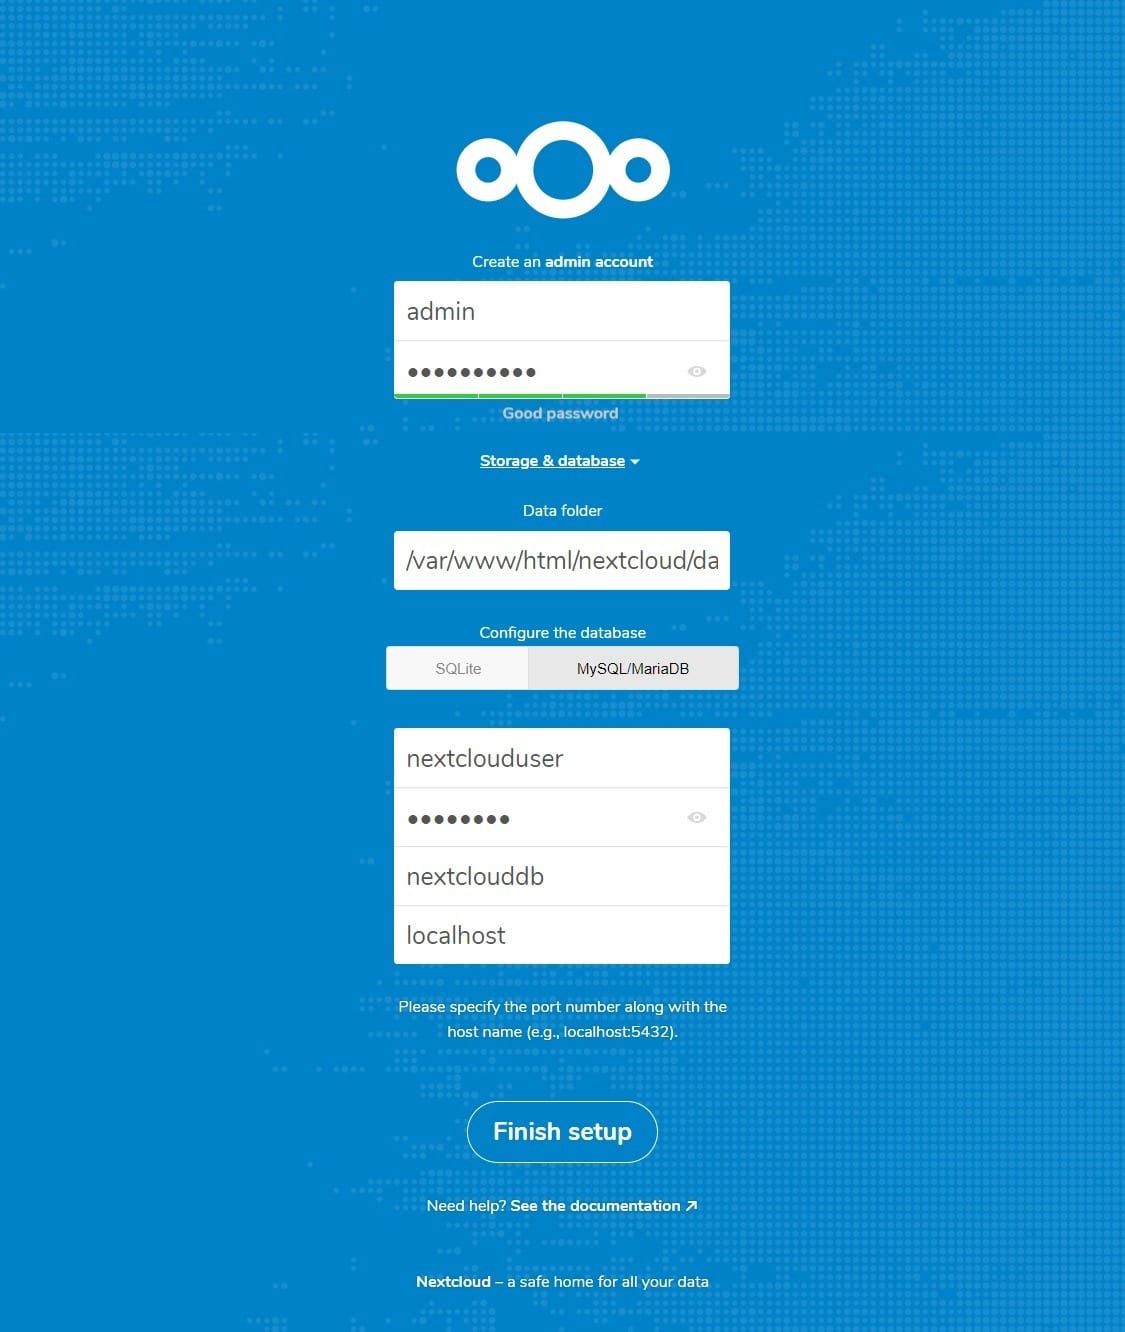
The browser will take you automatically to NextCloud setup page where you have to begin the setup of NextCloud.
Also Read: How to Install ClamAV on CentOS 7
You can choose either SQLite or MySQL/MariaDB. If you want to SQLite database, then you do not have to enter database details (not recommended for production use). Whereas MariaDB requires database user, password, and database name.
For this tutorial, we will use MariaDB as a backend database.
Enter admin details (username and password), data folder location where all of your documents get saved, and database information.
Access Nextcloud
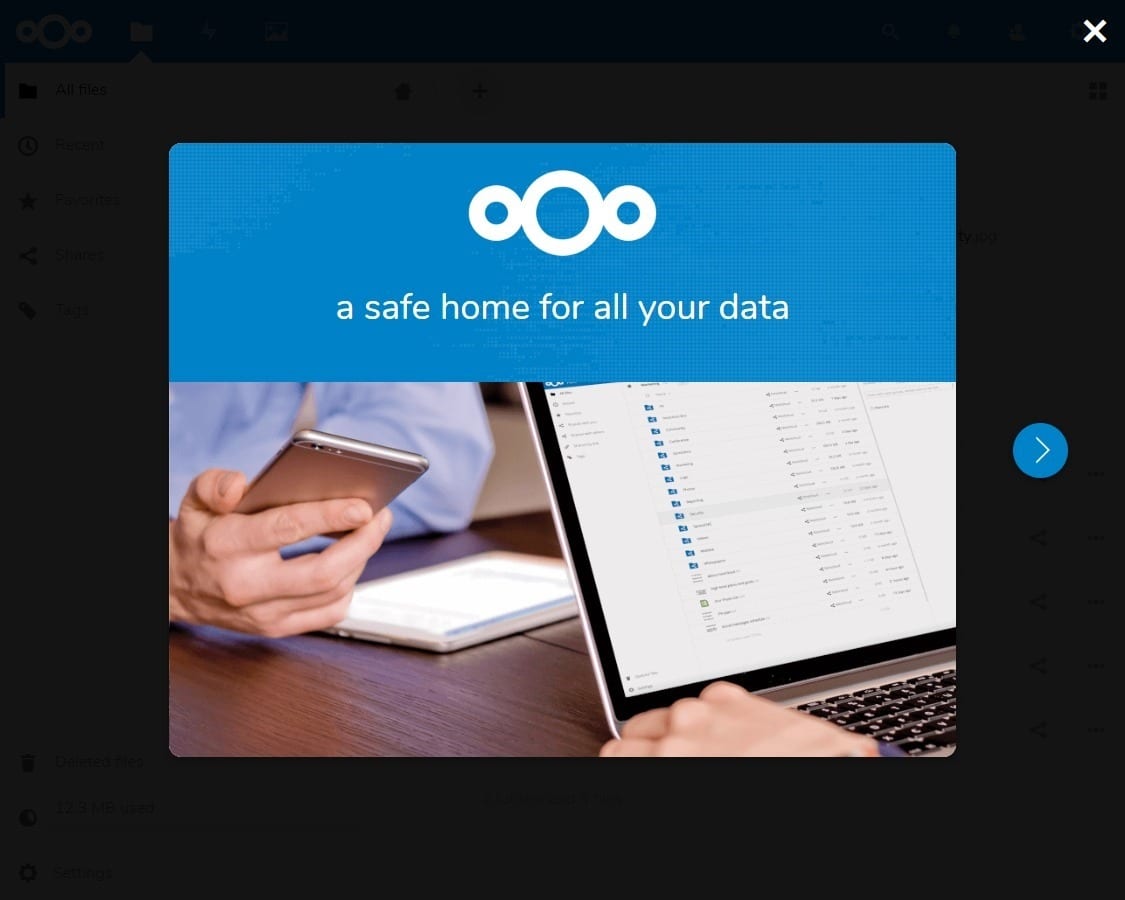
Once the set up is complete, you will get the below popup. Click on close.
The home page of NextCloud will look like below, and you can start uploading the contents using “+ sign” button.
Conclusion
That’s All. We have successfully installed NextCloud – File Share and Collaboration platform on CentOS 7.
To find more information about how to manage your Nextcloud instance visit the Nextcloud documentation page.
If you have any questions, please leave a comment below.


