
How to containerize and deploy your project using Docker Image
Most people have installed Docker on their workstations or their VPS, but not many have explored its full potential.
Most people have installed Docker on their workstations or their VPS, but not many have explored its full potential. Maybe you’ve used Docker to host your website or blog, or perhaps you use it on your local machine to play around with applications others have written. Maybe working with Docker images seems like a stretch, and the extent of your Docker knowledge is the docker pull, docker run and docker start commands.
If that’s true, but you want to do more, you’ve come to the right place! In this post, we’ll learn how applications like an Apache web server or the Python runtime are containerized, and how you can create Docker images/containers for your own projects as well.
Prerequisites
- Docker running on your local computer
Docker installed on your VPS.
An account wither Docker Hub or any other public/private Docker registry
A fundamental knowledge about docker and a few standard commands
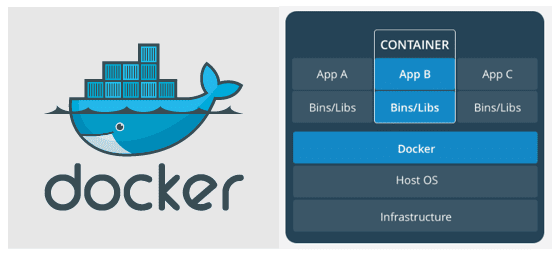
Docker images, containers, and layers
Let’s begin with the various states of a Dockerized application. When we build a Docker image for our project, the image itself is just a blob of data (like a binary) which you can push to a Docker registry, pulled into a different computer, and then used to create identical containers.
Also Read: 25+ Docker Commands for sysadmin and developers
When you run a Docker container, the Docker engine manages it, gives it resources, includes it within the Docker filesystem, and allocates an IP address to it. The container is the image manifesting itself as a running application, and the Docker engine allows you to start a container, stop it, or resume it—exactly like when you run a virtual machine.

Layers are an essential substructure of a Docker image. Without the concept of layers, creating a Docker image would involve creating everything, from C libraries to core dependencies like language support for your application itself, which could then depend on PHP, Node.js, etc.
But, thanks to layers, we don’t have to reinvent the wheel every time. We could use pre-existing images of, say, Ubuntu or Alpine Linux, and layer our application on top of it. This is the most common way of creating Docker images, and this is what we’ll learn in this post.
Containerizing a Node.js application
Let’s try to create a container that runs a simple HTTP server written in Node. Create a folder in your local workstation mkdir ~/sampleapp. Within this folder, let’s create two text files: app.js and Dockerfile. The details of app.js file are not that important, but you can glean some of its workings via the comments included.
const http = require("http");

http.createServer(function (request, response) {
   // Send the HTTP header
   // HTTP Status: 200 : OK
   // Content Type: text/plain
   response.writeHead(200, {'Content-Type': 'text/plain'});

   // Send the response body as "Hello World"
   response.end('Hello, World!n');
}).listen(80);
It is a simple HTTP server that listens on port 80 and can respond to incoming requests with the message Hello, World!. Let’s turn our attention to the Dockerfile.
A Dockerfile is a specially named file which you place at the root of your project’s repository. The command docker build goes through the instructions in this Dockerfile and crafts a Docker image with your application in it.
Let’s look at a simple Dockerfile which you should create in the same folder sampleapp:
FROM node:latest
WORKDIR /app
COPY . /app
EXPOSE 80
CMD ["node",  "app.js"]
Before looking at the minutiae of Dockerfile, let’s build an image first. Do this by running the following command in the folder where you placed your Dockerfile and app.js files:
$ docker build -t sampleapp .
This will look into the current directory (indicated by a period at the end) for a Dockerfile, execute its instructions, and build an image with tag sampleapp. Verify that it is created by running docker images.
Let’s create a container from this image by running the command:
$ docker run -p 8070:80 sampleapp
And you can now visit http://localhost:8070 to see the Hello, World! message.
Now, let’s go through the Dockerfile line by line to see how this was accomplished.
FROM image:version and RUN command
The first line FROM node:latest fetches the latest Node container release by Node Foundation on Docker Hub. If you need a specific version, say version 8, then you can change latest to the version number: FROM node:8.
This FROM statement brings in the base image, and the subsequent commands can add extra layers on top of it. But this base image itself will have a Node environment set up for us to run .js files and use the npm package manager.
Another way would be to bring in an Ubuntu base image and install Node on top of it.
FROM ubuntu:18.04
RUN apt-get update -y && apt-get install node -y
The FROM command brings in the official Ubuntu image. The RUN will execute any statement that follows it, inside of an intermediate container’s shell. In this case, it will run apt-get update with a -y flag, because we can’t give any inputs to the container, and will then continue towards installing Node.js.
Once the installation is finished, the modifications made to this intermediate container becomes a part of the image as another layer gets added on top of the Ubuntu base image.
As a rule of thumb we try to keep the number of layers to a minimum, for a faster build process, which is why we went directly with node as our base image.
WORKDIR /app
Typically, your application lives in a specific directory. If you are running a web server, /var/www/html is the common choice. Similarly, our application needs to live in a directory inside the container. To specify this, we use the WORKDIR keyword followed by the absolute path of the desired folder inside of the container. If the folder (or directory) doesn’t exist, Docker will create it.
WORKDIR /app
Now, when we run CMD later, to execute the app.js file within the container, the Dockerfile will first look into the /app directory for a file called app.js instead of looking elsewhere. This way, you won’t have to mention it explicitly as node /app/index.js.
COPY . /app
While we have created a working directory for our app, you haven’t yet placed the app inside it. The COPY . /app instruction would copy, to the container’s /app directory, the entire contents of the current directory (where your Dockerfile is), from your local machine. This is why we place the Dockerfile at the root of our project’s repository, so it transfers every subfolder and every file within those folders into the container.
You can create an additional file, called .dockerignore, and mention the folders and files within your repository that you wish to exclude from being containerized.
EXPOSE
The expose command exposes the port 80 of the image. Since our node app listens on port 80, this port needs to be exposed. We would later configure port forwarding so that the request would flow through a specific port on the host system to the port 80 of our container.
EXPOSE 80
CMD [“node”, “index”]
The CMD command is similar to RUN command. The array of strings that follow the keyword are executed as node app inside the container. The difference between CMD and RUN is that RUN executes the command and adds that becomes a part of the Docker image.
Commands followed by CMD are executed when you create a container and the result of these commands live and die with that container, and are not made part of the Docker image. As mentioned earlier, our working directory is /app, so the command executes the node index command inside of the /app directory.
Essentials of a Dockerfile
To summarize the gist of it:
| Keyword | Effect |
|---|---|
| FROM | Pulls a base image |
| RUN | Runs command to modify the image |
| WORKDIR | Creates a Working directory |
| CMD | Commands that run upon container creation |
| EXPOSE | Exposes a specific port number of a container |
While there are other keywords and essential concepts related to Dockerfile, this is enough to get you started for the first time.
The Docker Hub
Having created an image, let’s use the Docker Hub to save and share this image with others.
Sign up at Docker Hub if you haven’t already and create a repository named sampleapp.
Login to your Docker Hub using the command:
$ docker login
Running this command will prompt you for your username and password. Once you’re logged in, you might want to rebuild the Docker image (on your local machine) with the appropriate tag. Let’s remove the one we created earlier.
$ docker rmi sampleapp
Now you need to add your username to your image tag to tell Docker where to push the contents. So if your username is john, the build command will be docker build -t john/sampleapp ..
In general, you use the tag like this, given USER.
$ docker build -t USER/sampleapp .
$ docker push USER/sampleapp
Once you’ve pushed your image, you can log into your VPS and pull the image to spin it up in production! The command is simple:
$ docker pull USER/sampleapp
Wrapping up
Now that you understand the basics of Docker images, you can try pulling official base images for Python or Go, for example, and try to incorporate them into your project (if it uses these languages). Similarly, even simple HTML/CSS/JavaScript-based websites can be containerized using an Apache web server as your base image. Play around with it a bit! Once you get the hang of “Dockerizing” your web projects, they’ll be that much easier to deploy to your VPS or share with others on GitHub or the Docker Registry.